Getting Started with TalentsGrid: Your First 15 Minutes
Create your workspace, pick where CVs are stored, add a job, bring in candidates, use the hiring chat, move people through the pipeline and invite your team.
On this page
- Key takeaways
- How do I create my account and workspace?
- Where are my CVs stored?
- How do I add my first job?
- How do I bring in candidates?
- How do I score a CV against a job?
- How do I move candidates through the pipeline?
- How do I invite teammates?
- What are the product tour and help hints?
- How do AI credits work?
- FAQ
This guide takes you from a new account to a working hiring pipeline. You will create a workspace, choose where CVs are stored, add a job, bring in candidates, try the hiring chat and invite a teammate. Each step says where to click, so you can follow along with the app open in another tab.
TalentsGrid is an AI hiring copilot for freelance recruiters and small teams: it scores each CV against your job with quotes as evidence, turns gaps into interview questions, and keeps your candidate data yours.
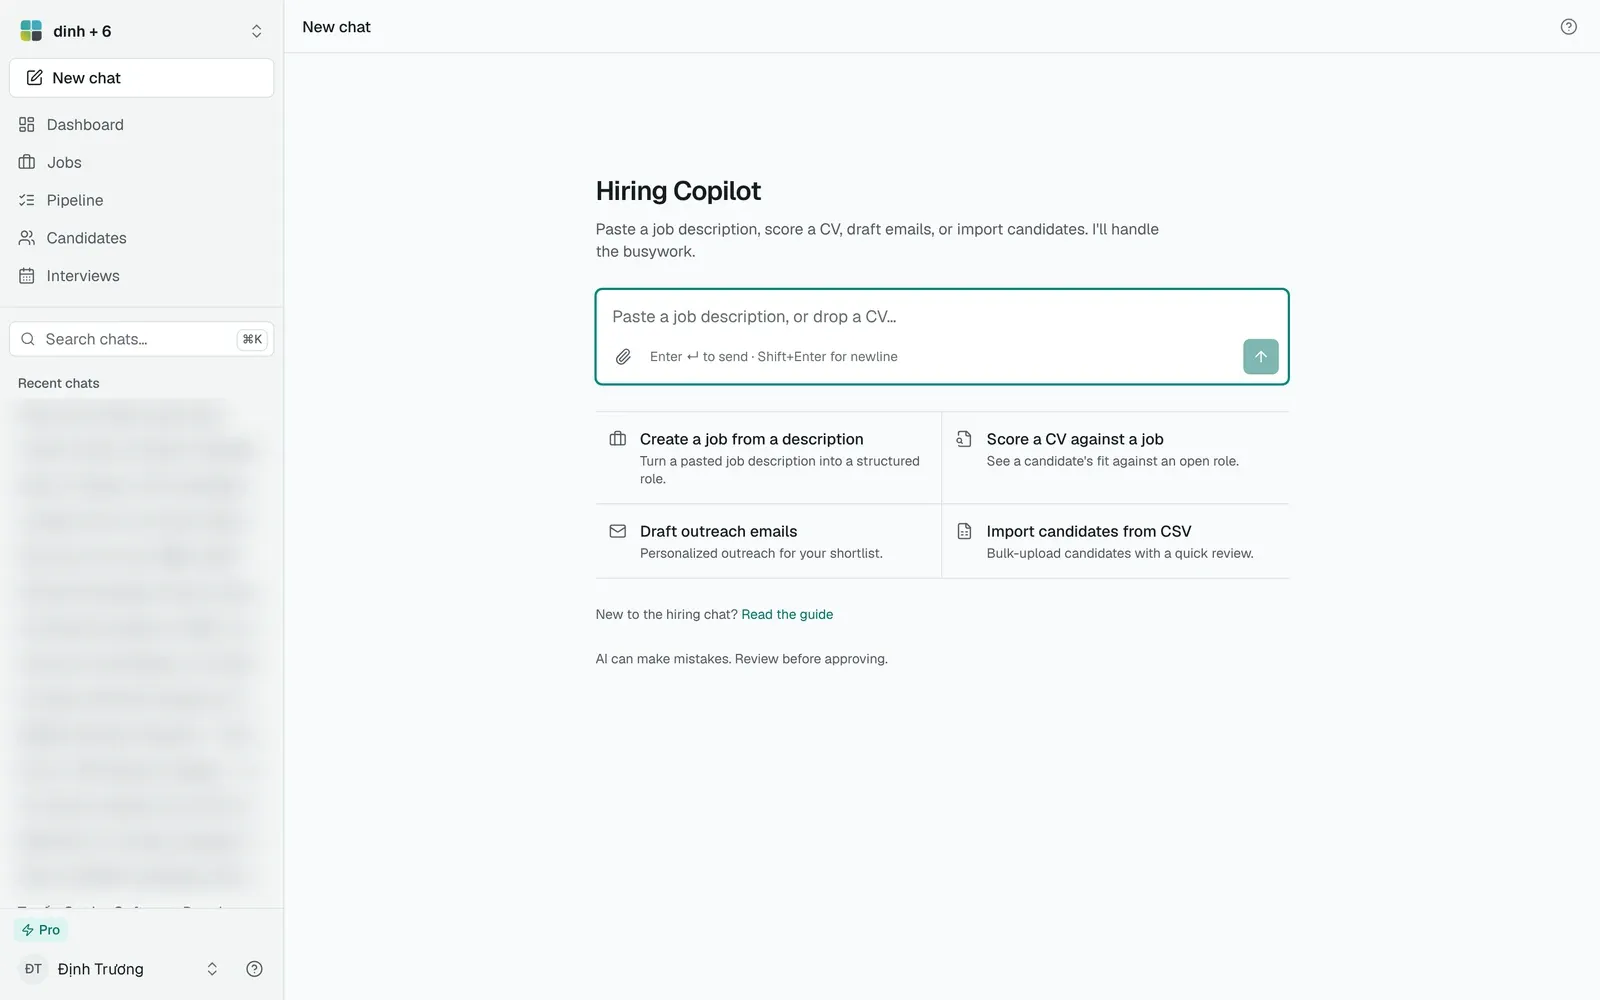
The chat start screen: the sidebar on the left, the composer in the middle and four starters below it.
Key takeaways
- Sign up with Google or an email address, then a short setup creates your first workspace. The Free plan includes one workspace, up to 500 candidates, 3 members per workspace and 150 AI credits a month.
- Choose Cloud storage (the default) or your own Google Drive for CVs. You can change it later in workspace settings.
- The hiring chat is the fastest way to add a job and candidates. The AI proposes, and you approve before anything is saved.
- The Pipeline page shows every application by stage: Applied, Screening, Interviewing, Offer, Hired and Closed.
- Teammates must have a TalentsGrid account before you can invite them.
How do I create my account and workspace?
Go to app.talentsgrid.com and use the Register tab. The setup takes a couple of minutes.
- Choose Create account with Google, or enter an email and password and select Create account.
- If the app asks you to verify your email, enter the 6-digit code it sends you. The code expires in 10 minutes, and you can ask for a new one.
- On the Create your recruiting workspace page, select Start setup.
- Enter a Workspace name. Use your company, a client or your solo practice name. It needs at least 2 characters. Industry and website are optional. Select Next step.
- Under Choose CV storage, pick Cloud storage (marked Recommended) or Google Drive. The storage guide explains the difference.
- Select Create workspace. If you picked Google Drive, the button reads Create and connect Drive and one more step follows to connect your Drive.
- When you see Workspace ready, select Go to dashboard. The button opens the hiring chat, which is where most of the work happens.
A workspace holds your candidates, jobs, interviews and files. If you recruit for several clients, give each client its own workspace so their data stays apart. Free includes 1 workspace, Pro 5 and Business has no limit.
Where are my CVs stored?
By default CVs go to managed cloud storage, which is ready as soon as the workspace exists. If your clients expect CVs to stay in your organisation’s Google Drive, choose Google Drive instead. You can switch later under Workspace settings, then the Storage and reporting tab. Read how to set up workspace storage before you decide, especially if you plan to use Drive.
How do I add my first job?
You can add a job from the chat or from the Jobs page.
From the chat
- Open a new chat. The sidebar has a New chat button, and the start screen offers “Create a job from a description”.
- Paste the job description, or type
/create-jobfollowed by the role and key skills. - A Create job card shows the fields the AI filled in. Edit any field, and fill in what is missing. A job title is required.
- Select Create job to save it, or Discard to drop it.
From the Jobs page
- Open Jobs in the sidebar and select Add job.
- Enter a Job title (required) and describe the role. You can refine it later.
- Select Create job.
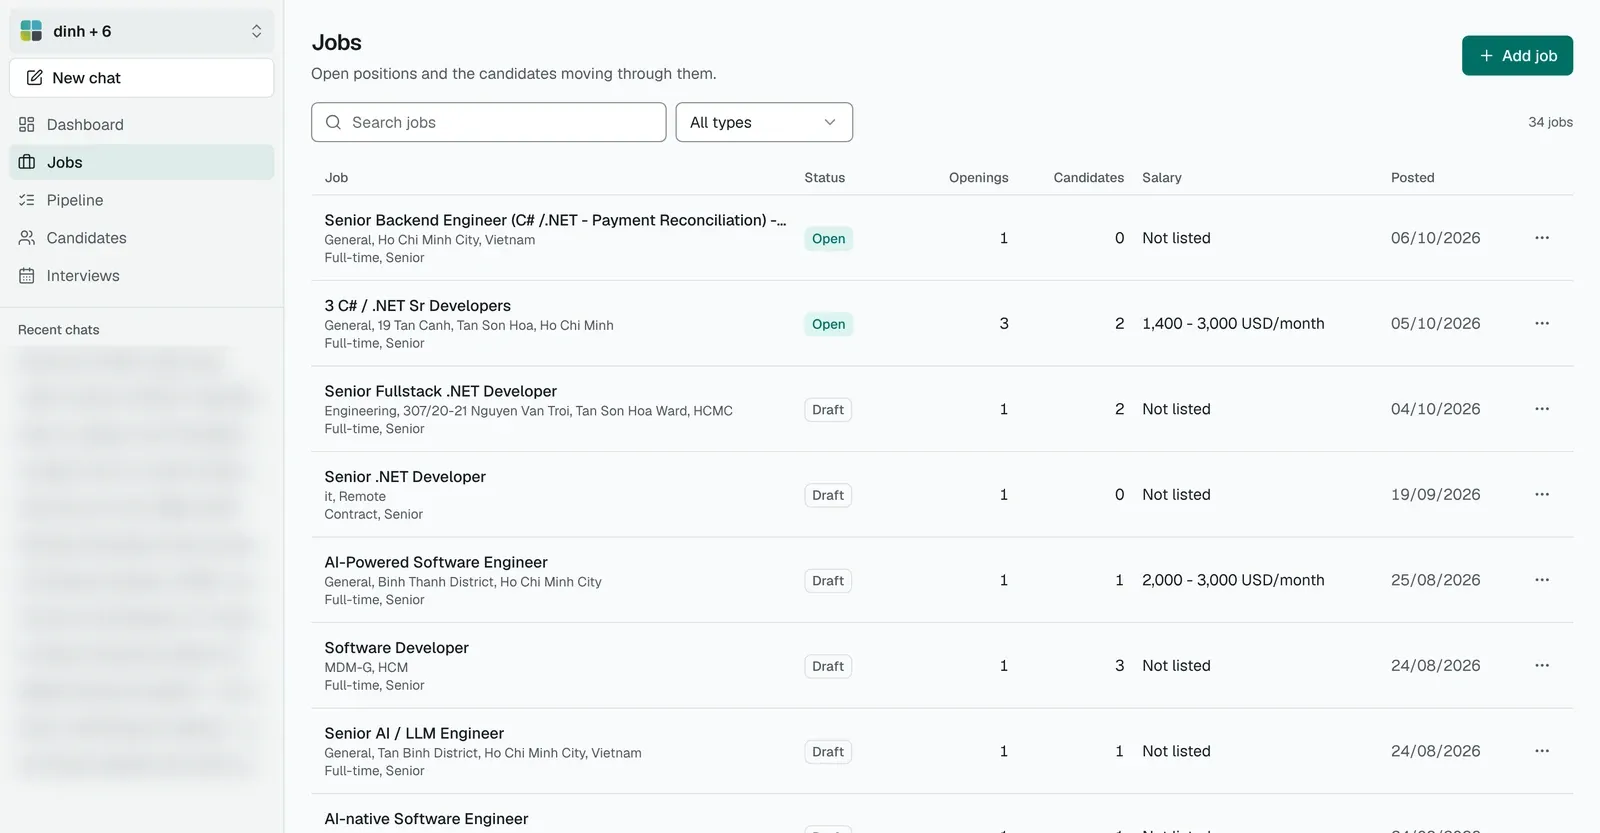
The Jobs page. Select Add job in the top right corner.
Both routes give you the same job. The chat is quicker when you already have a job description to paste.
How do I bring in candidates?
Pick the route that matches what you have.
- A CV file. In the chat, attach the CV or drop it on the composer. The copilot reads it and shows a candidate preview. Select Approve to save the candidate. Reading one CV costs 1 AI credit. See how CV import works.
- One candidate by hand or from a CV. On Candidates, select Add candidate. The dialog offers Quick import from CV (PDF, DOC or DOCX up to 5 MB) or you can type the details yourself.
- A spreadsheet. On Candidates, select Import Excel. Download the template first so your columns match. In the chat,
/import-csvdoes the same for a CSV file and shows a preview before it saves anything.
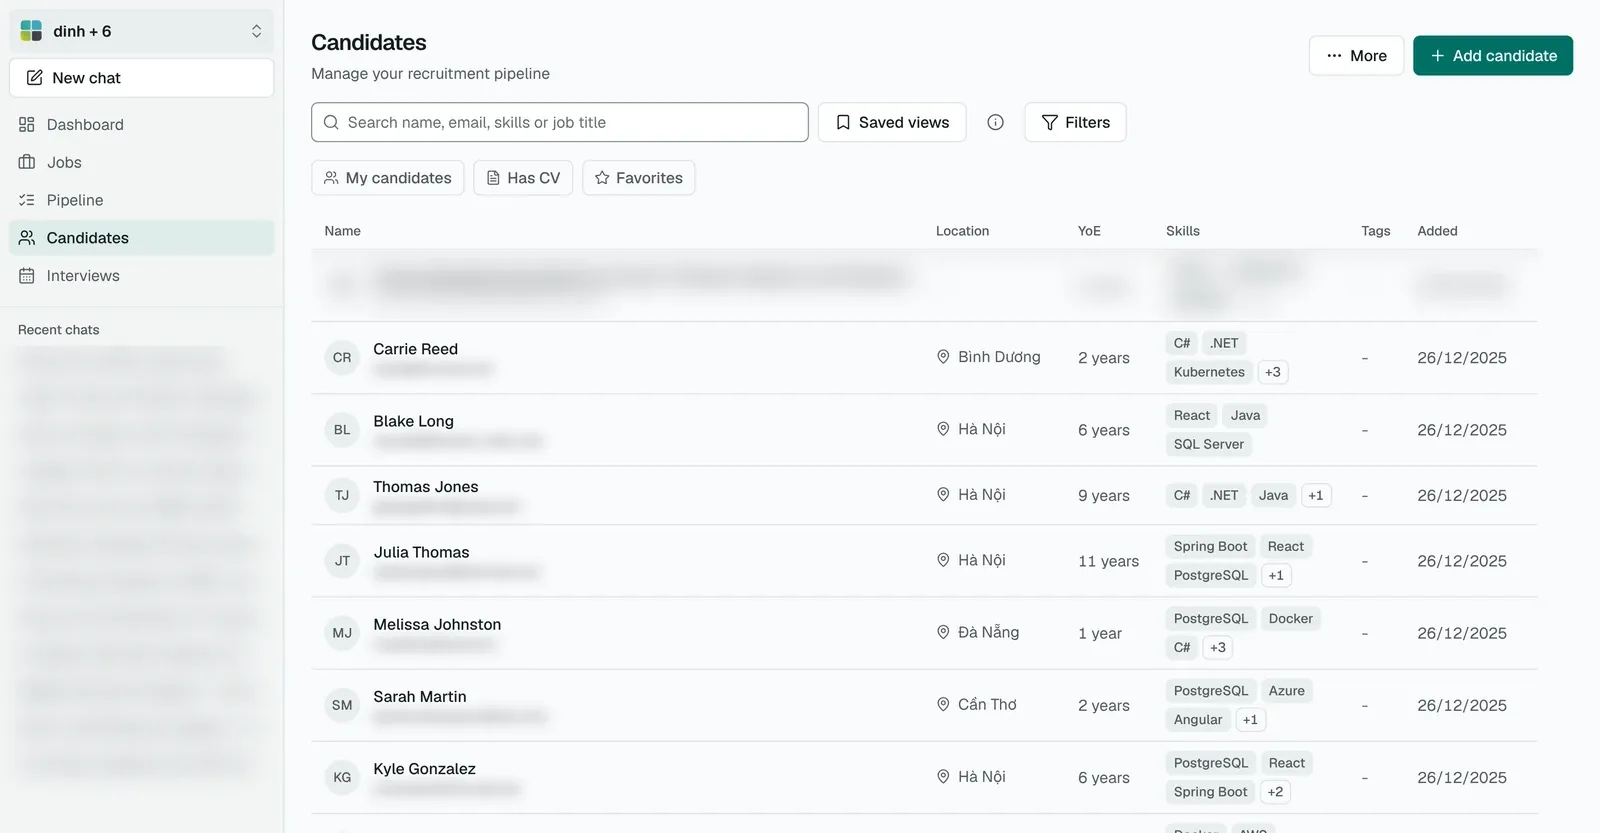
The Candidates page. Add candidate is at the top right and More holds the import options.
If a candidate with the same email or phone already exists, the chat offers to update that profile instead of creating a duplicate.
How do I score a CV against a job?
Open the job and select Ask HRMX. The chat opens linked to that job. Attach a CV, or choose “Score a CV against a job” on the start screen.
The fit score card shows how the candidate matches the job’s requirements and responsibilities. Each requirement is marked Match, Partial or Not evidenced, so you can see where a score comes from. “Not evidenced” means the CV does not show it, which is not the same as a failed requirement. The card can also suggest follow-up questions for the gaps.
The hiring chat guide covers scoring, comparing candidates and the credit cost of each action.
How do I move candidates through the pipeline?
Open Pipeline in the sidebar. Candidates appear as cards in columns for each stage: Applied, Screening, Interviewing, Offer, Hired and Closed. Use the Job filter to look at one job at a time.
- Drag a card to another column on a desktop screen, or open the card and change its Stage.
- To reject someone, open the card and select Reject. Enter a reason, then Reject candidate. The application moves to Closed and the reason is saved in its notes.
- Use the notes, interview rounds and expectation tabs in the same panel to keep everything about the application together.
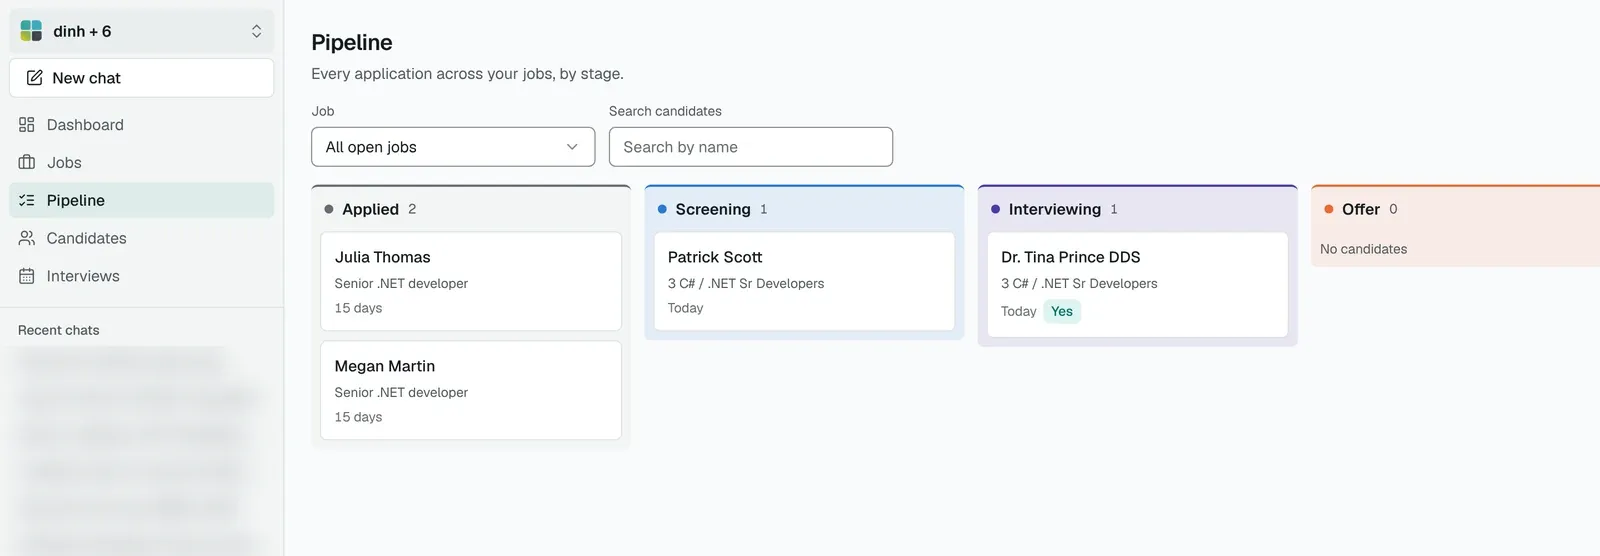
The Pipeline board. Each column is a stage, and the Job filter narrows it to one role.
You can also move people from the chat. Candidate cards have buttons such as Shortlist and Move to interview, and the result appears in the chat with an Undo link while the change is safe to reverse.
How do I invite teammates?
- Select the workspace name at the top of the sidebar, then Workspace settings.
- Open the Team members tab and select Invite members.
- Enter the person’s email and choose a Role.
- Select Invite user.
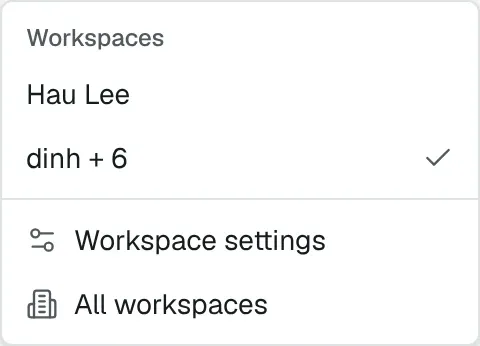
Step 1: open the workspace switcher at the top of the sidebar and choose Workspace settings.
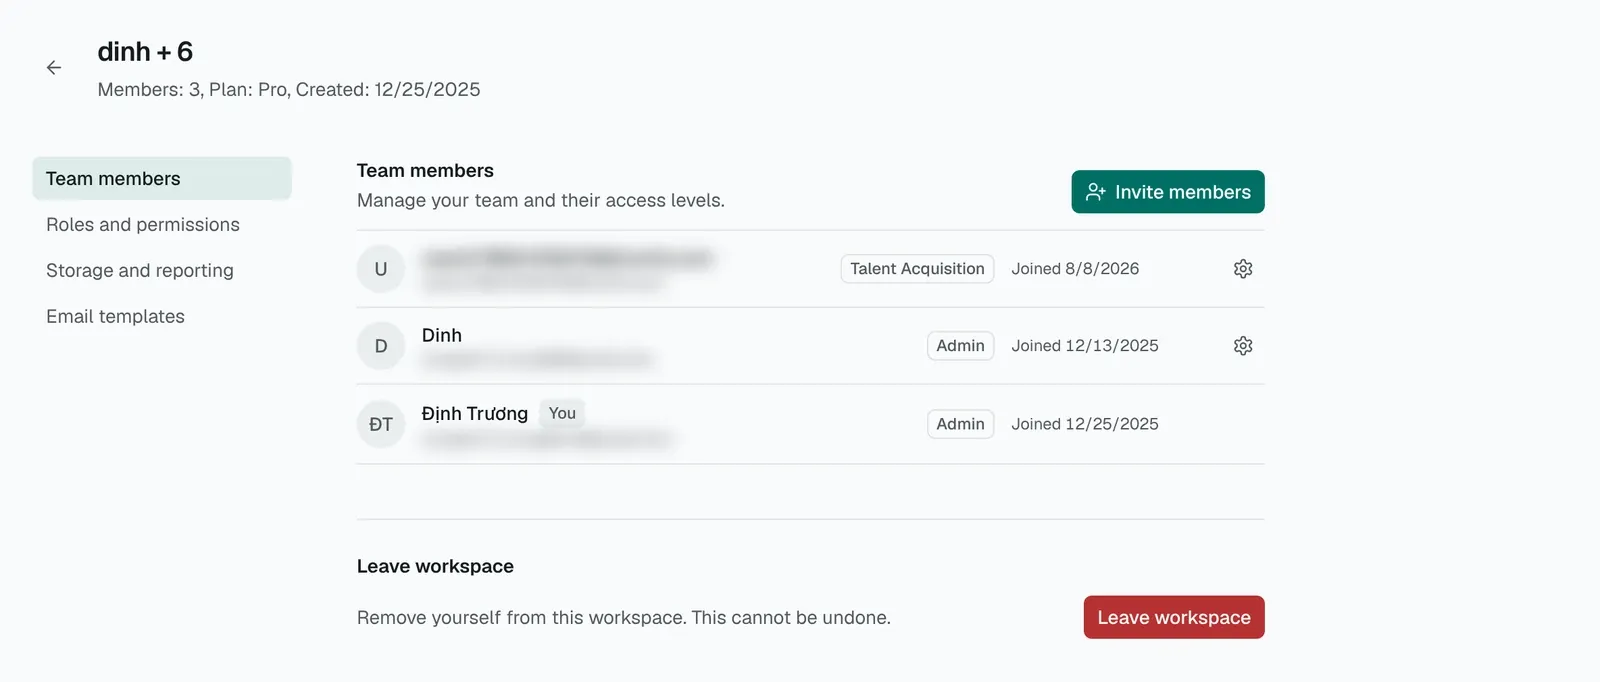
Step 2: the Team members tab, where Invite members sits at the top right.
Two things to know. The person must already have a TalentsGrid account, otherwise the invite fails with a message saying they need to register first. And TalentsGrid does not send an email for the invitation. Tell your teammate, and they will see the invitation under Pending invitations when they open the app, where they select Accept or Reject.
The Free and Pro plans allow 3 members per workspace and Business 50. The roles and permissions guide explains the built-in roles.
What are the product tour and help hints?
The first time you open the app, a short product tour points at the main areas: the chat, candidates, jobs, the pipeline and settings. You can skip it, and you can start it again from the help menu in the app. Small ”?” help buttons and tips next to complex features open a short explanation with a few common questions and a link to the full guide.
How do AI credits work?
Credits are the unit of AI usage. Most AI tasks, such as reading a CV or drafting an email, cost 1 credit. The Free plan includes 150 credits a month, Pro 1,500 and Business 15,000. On a paid plan the credits are shared by every workspace you own. The Dashboard shows “AI credits left” for your workspace. See the pricing page for current plans.
FAQ
Do I need a credit card to start?
No. The Free plan costs nothing and needs no card. It includes 150 AI credits a month, up to 500 candidates, 1 workspace and 3 members per workspace.
Can I change where CVs are stored after setup?
Yes. Open Workspace settings, then Storage and reporting, and choose the other provider. New uploads go to the provider you choose. The storage guide explains what happens to files you uploaded earlier.
Will the AI reject or shortlist candidates on its own?
No. The AI recommends and you decide. Creating or updating a candidate or a job waits for your approval of a preview. Actions you start from a card button, such as shortlist or move to interview, run when you click, and stage changes can be undone from the chat.
Which files can I attach in the chat?
PDF, Word (.docx) and plain text files, up to 15 MB each. A scanned image with no readable text cannot be read. Old .doc files may not be readable, so save them as .docx or PDF first.
I added a job but the chat says no job is linked. What now?
Open the job and select Ask HRMX so the chat is linked to it. Or paste the job description in a new chat and create the job from the card.
Why can’t I invite someone?
Check three things: they have registered an account, your role includes the “Manage company users” permission, and your workspace has not reached the member limit for your plan.
Is there a guide for each feature?
Yes. Read the hiring chat guide, the storage setup guide and the roles and permissions guide.