Workspace Roles and Permissions: Invite and Manage Your Team
Invite teammates to a TalentsGrid workspace, understand the four built-in roles and each permission, create custom roles, change access and remove members.
On this page
- Key takeaways
- What are the built-in roles?
- What does each permission control?
- How do I invite a teammate?
- How do I change a member’s role?
- How do I create a custom role?
- How do I remove someone’s access?
- How do workspace settings differ from the admin console?
- How many members does my plan allow?
- FAQ
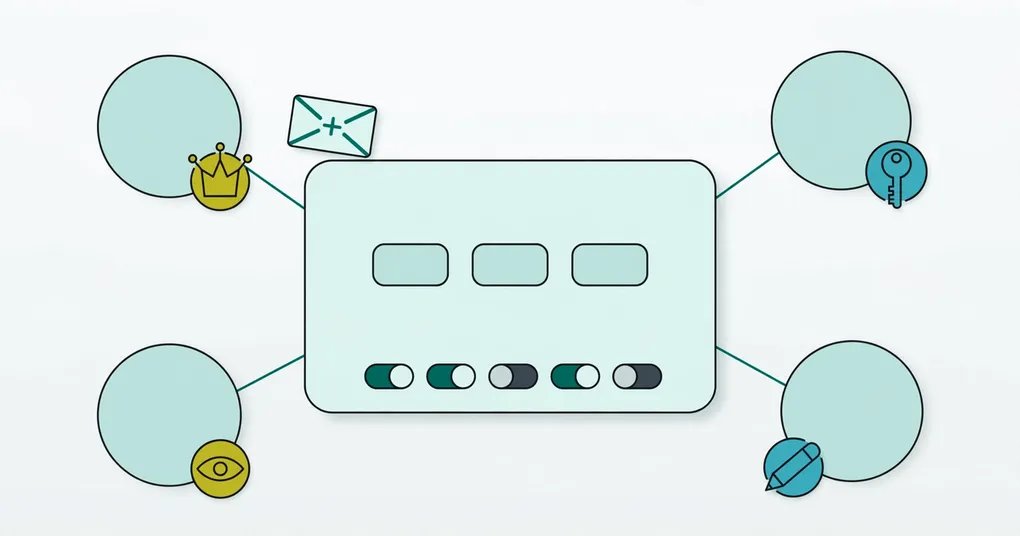
A workspace in TalentsGrid is shared by its members, and each member has one role that decides what they can see and change. This guide covers the built-in roles, what every permission controls, how to invite a teammate, how to change or remove access, and how workspace settings differ from the platform admin console.
Key takeaways
- New workspaces come with four roles: Read-only User, Talent Acquisition, Hiring Manager and Admin. The person who creates the workspace is its Admin.
- You can create custom roles and pick permissions for the dashboard, jobs, candidates, interviews and the workspace.
- Inviting needs the “Manage company users” permission. Creating and editing roles needs “Manage company roles and permissions”.
- The invited person must already have a TalentsGrid account. No email is sent, so tell them the invitation is waiting.
- Free and Pro allow 3 members per workspace and Business 50.
What are the built-in roles?
Every new workspace gets four roles automatically. If the list is ever empty, select Initialize default roles on the Roles and permissions tab.
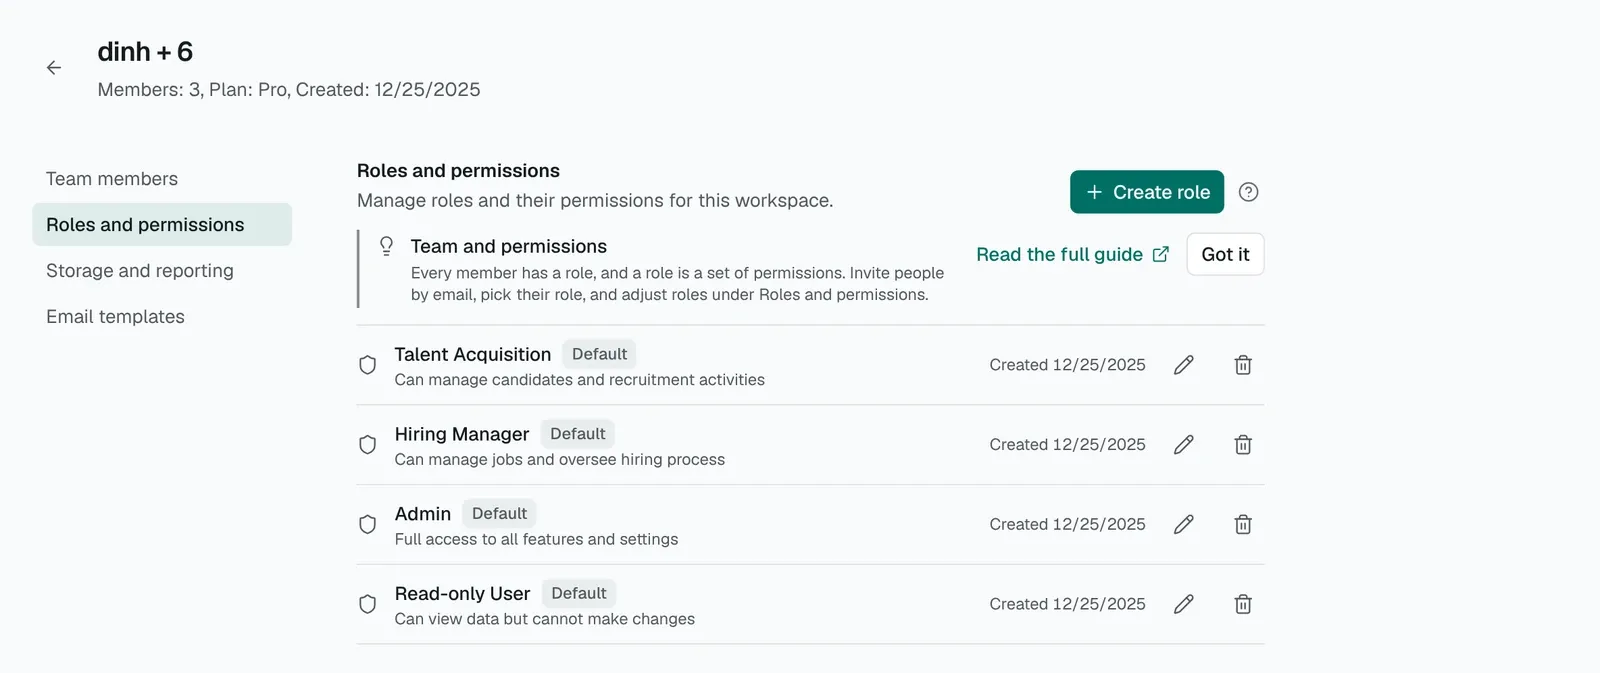
The four default roles on the Roles and permissions tab.
| Role | Description in the app | Main permissions |
|---|---|---|
| Read-only User | Can view data but cannot make changes | View the dashboard, jobs, candidates and meetings |
| Talent Acquisition | Can manage candidates and recruitment activities | View jobs; view, create, update, delete and add notes to candidates; manage meetings; view, manage and send outreach |
| Hiring Manager | Can manage jobs and oversee hiring process | Create, update and delete jobs; view candidates and add notes; manage meetings; view outreach |
| Admin | Full access to all features and settings | Everything, including users, roles, storage, workspace updates and AI audit logs |
A solo recruiter usually stays Admin. For a client or a hiring manager who only needs to follow progress, Read-only User or Hiring Manager is usually enough.
What does each permission control?
Permissions come in groups. The names below are the ones you see in the role editor.
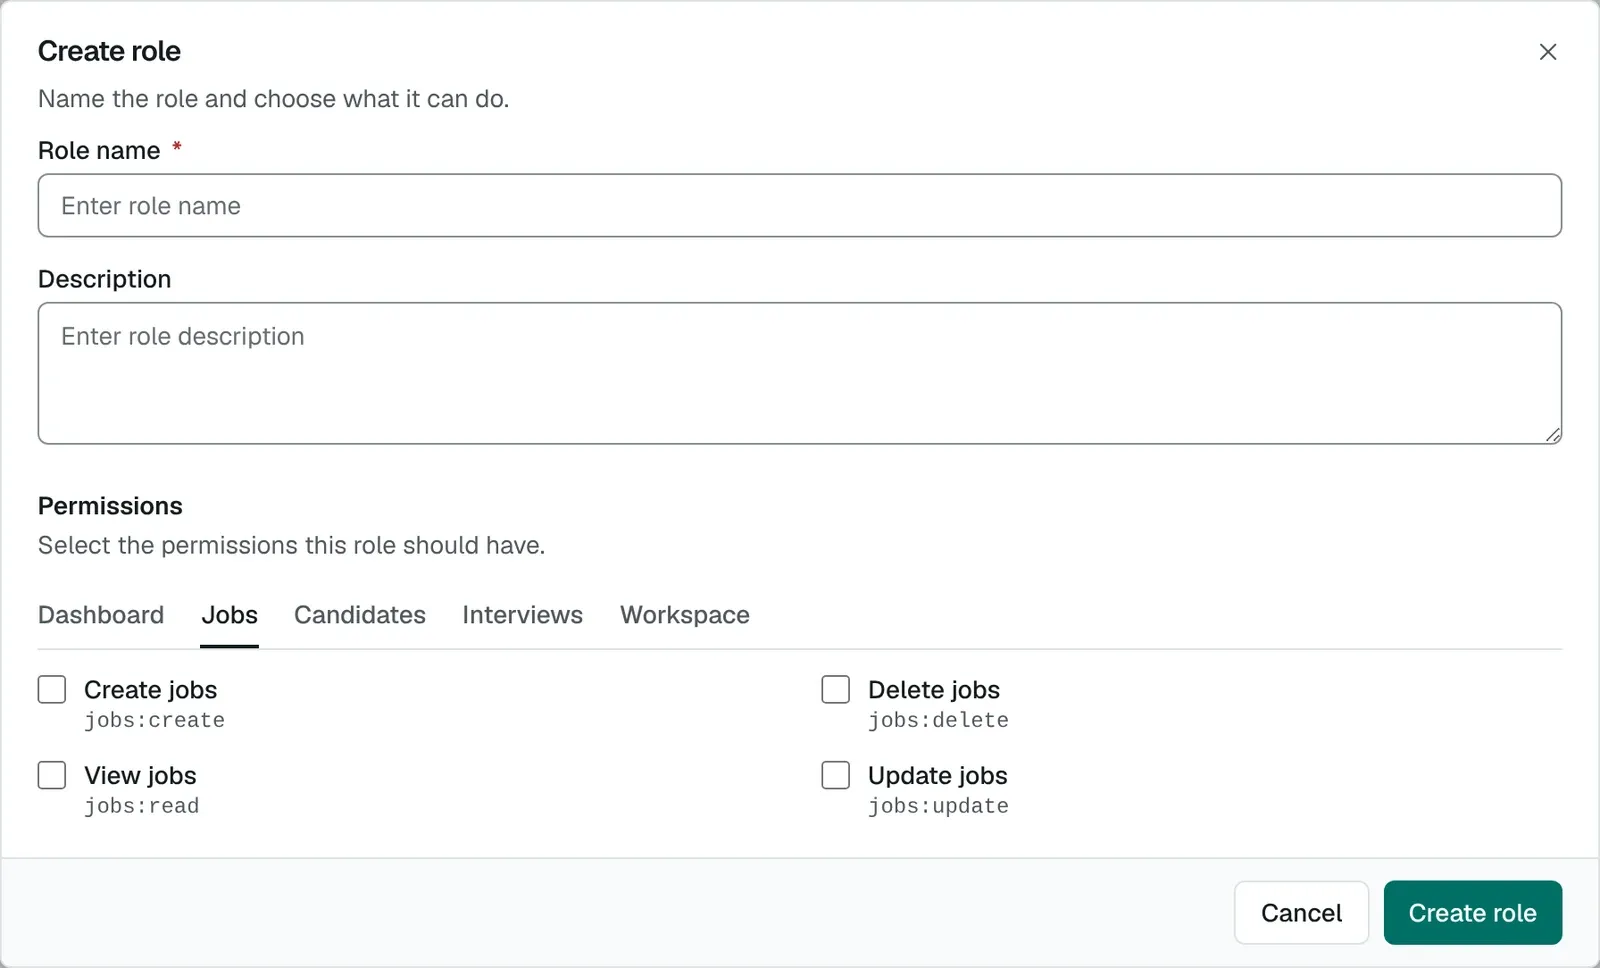
The role editor groups permissions in tabs. Each checkbox shows its permission name, such as jobs:create.
| Group | Permission | What it allows |
|---|---|---|
| Dashboard | dashboard:read | View dashboard |
dashboard:write | Modify dashboard settings | |
| Jobs | jobs:read | View jobs. Shows Jobs in the sidebar |
jobs:create, jobs:update, jobs:delete | Create, update and delete jobs | |
| Candidates | candidates:read | View candidates. Shows Candidates, Pipeline and the hiring chat in the sidebar |
candidates:create, candidates:update, candidates:delete | Create, update and delete candidates | |
candidates:notes | Add and edit candidate notes | |
| Interviews | meetings:read | View meetings. Shows Interviews in the sidebar |
meetings:create, meetings:update, meetings:delete | Create, update and delete meetings | |
| Workspace | company:read | View company information |
company:update | Update company information. Opens the workspace Email templates tab | |
company:manage_users | Manage company users: invite members, change roles, remove members | |
company:manage_roles | Manage company roles and permissions | |
company:manage_storage | Manage cloud storage settings. Opens Storage and reporting | |
ai_audit:read | View AI audit logs | |
| Outreach | outreach:read | View outreach sequences |
outreach:manage | Create and manage outreach sequences | |
outreach:send | Approve and send outreach emails |
The chat follows the same rules. For example, uploading a CV in the chat needs permission to update candidates. A teammate without a permission does not see the matching page or tab, or sees a message such as “You don’t have permission to manage workspace storage or reporting settings.”
How do I invite a teammate?
- Select the workspace name at the top of the sidebar, then Workspace settings.
- On the Team members tab, select Invite members. You only see the button if you have “Manage company users”.
- Enter the person’s email.
- Choose a Role from the list.
- Select Invite user. You see “Invite sent to user”.
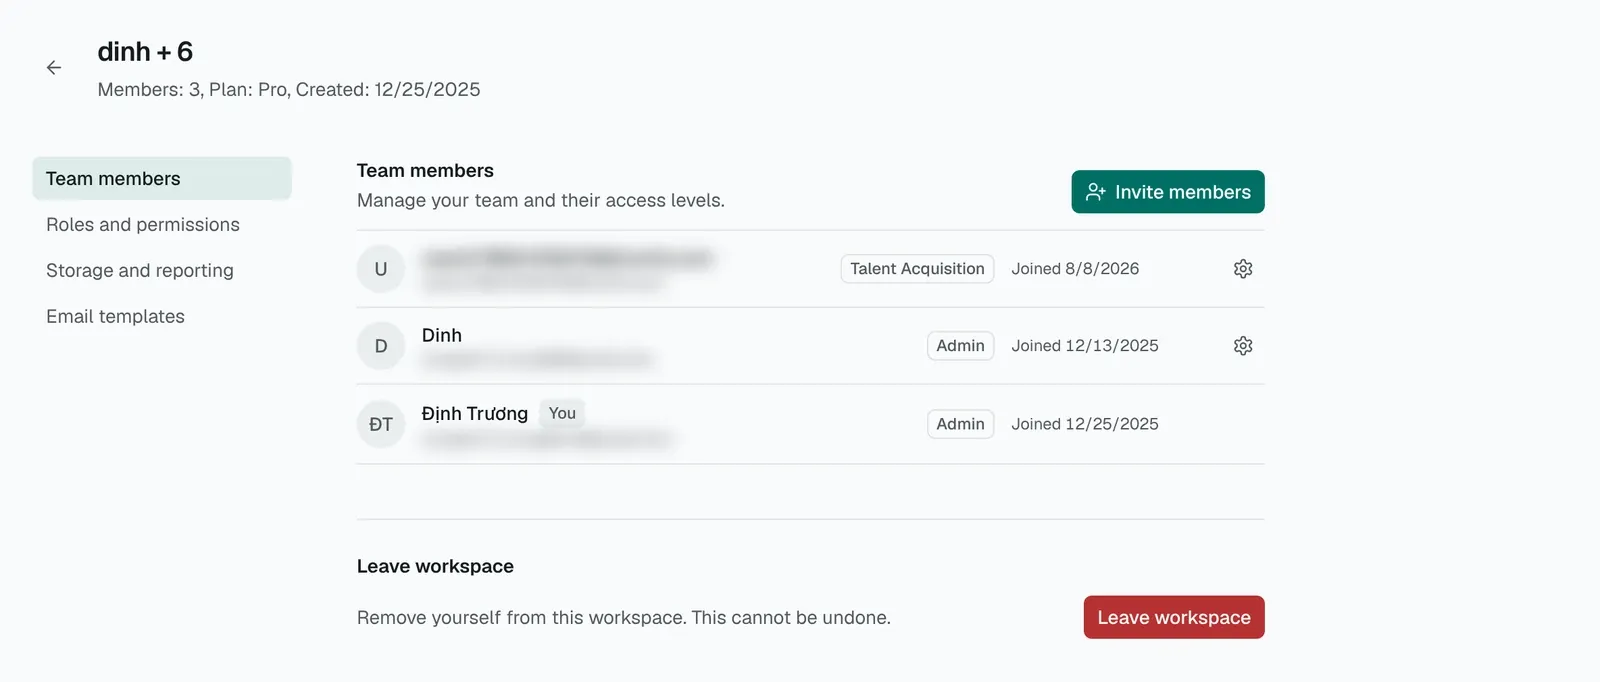
Step 2: Invite members is at the top right of the Team members tab.
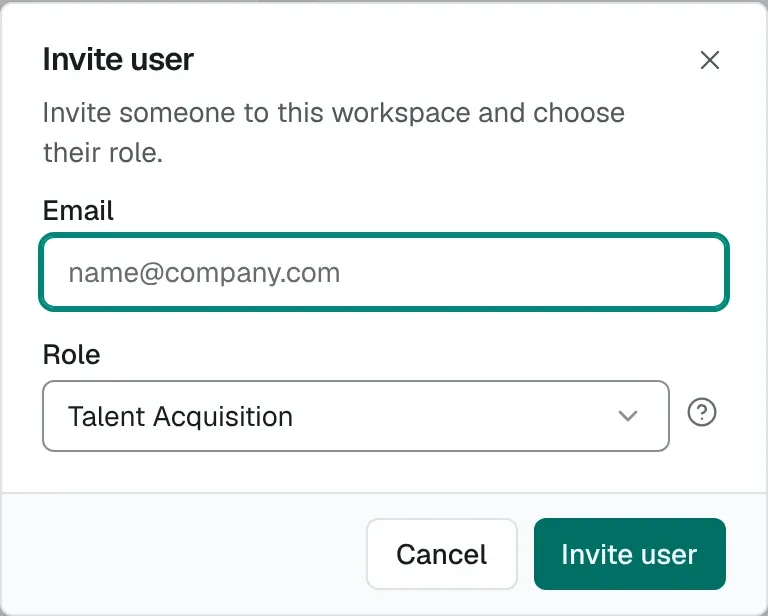
Steps 3 to 5: enter the email, choose a Role and select Invite user.
Before you invite, check these points.
- The person must have registered a TalentsGrid account with that email. Otherwise the invite fails and asks you to make sure they have registered.
- TalentsGrid does not email the invitation. Send them a message yourself.
- They see it under Pending invitations when they open the app and can Accept or Reject it. A red dot on the workspace switcher shows that an invitation is waiting.
- Pending invitations count toward your member limit.
How do I change a member’s role?
- Open Workspace settings and the Team members tab.
- Select the gear icon, labeled “Manage” and the member’s name, on their row.
- On the User settings page, choose a role under Role.
- Select Update role.
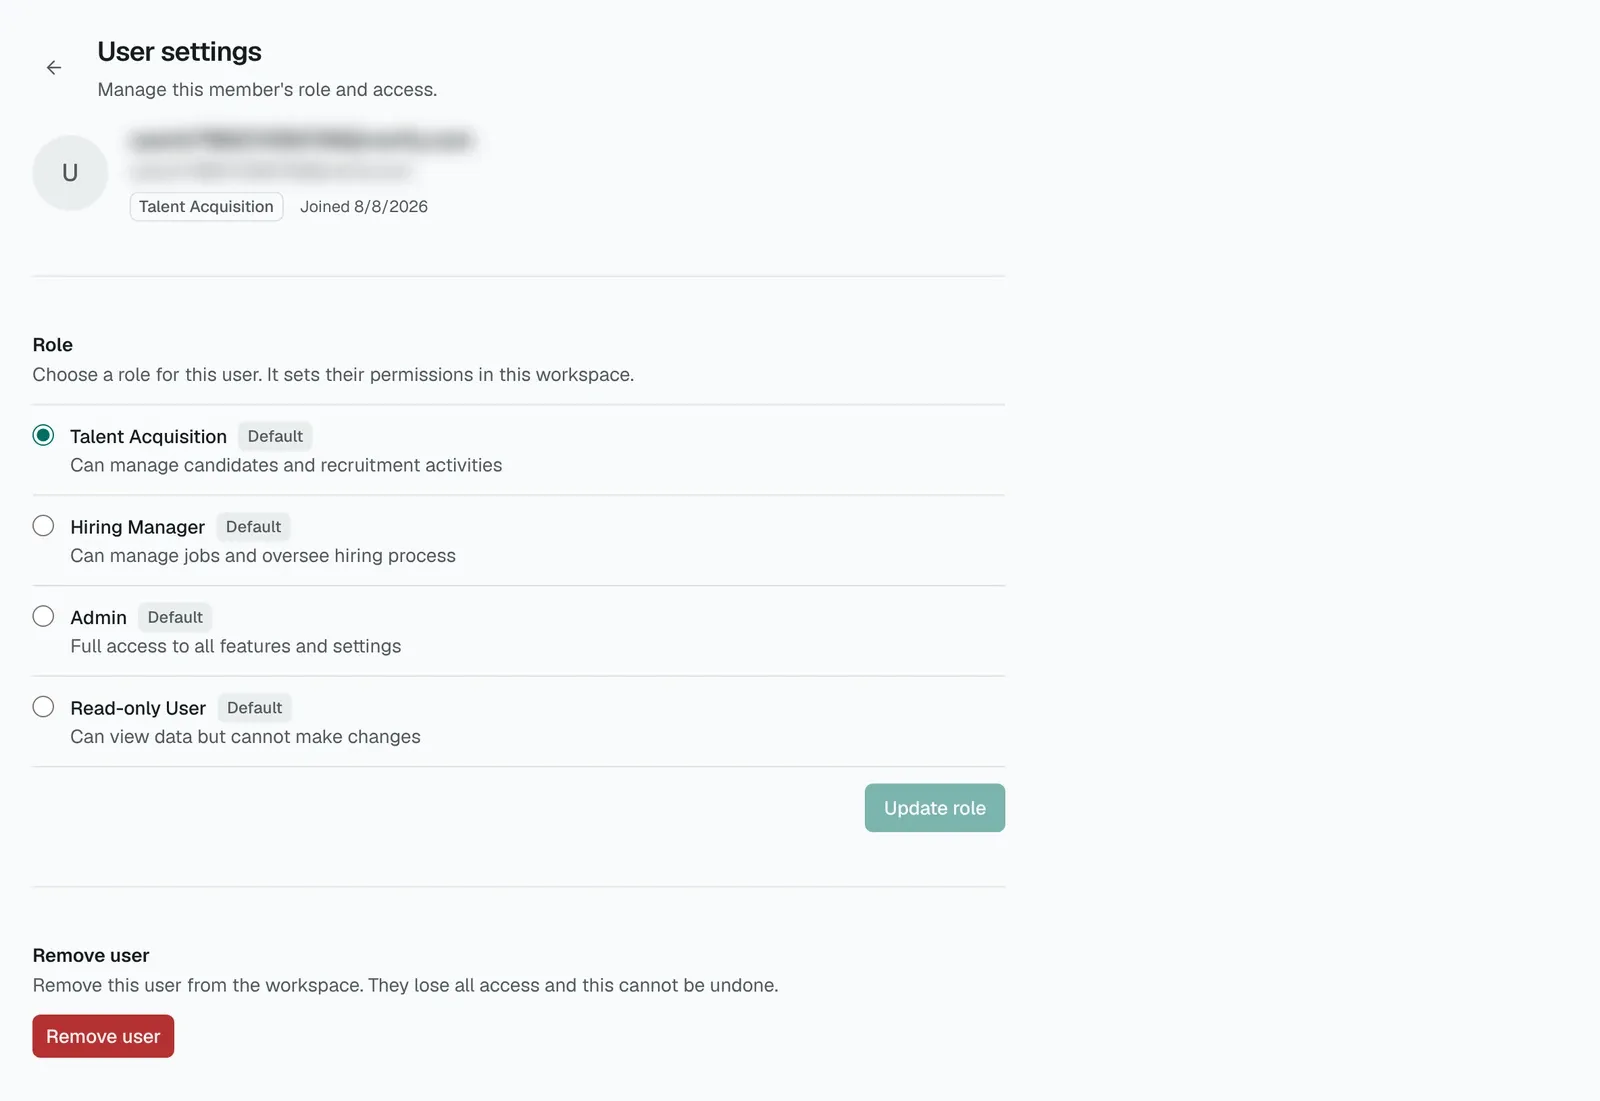
The User settings page: choose a role, then select Update role.
You cannot change your own role. Another admin has to do it. The same page shows “No role assigned” if the member has none.
How do I create a custom role?
- Open Workspace settings, then Roles and permissions. You need “Manage company roles and permissions” to load the list.
- Select Create role, or Create custom role if the list is empty.
- Enter a Role name and, if you like, a Description. Names must be unique in the workspace.
- Under Permissions, move through the tabs Dashboard, Jobs, Candidates, Interviews and Workspace, and tick what the role should have.
- Select Create role.
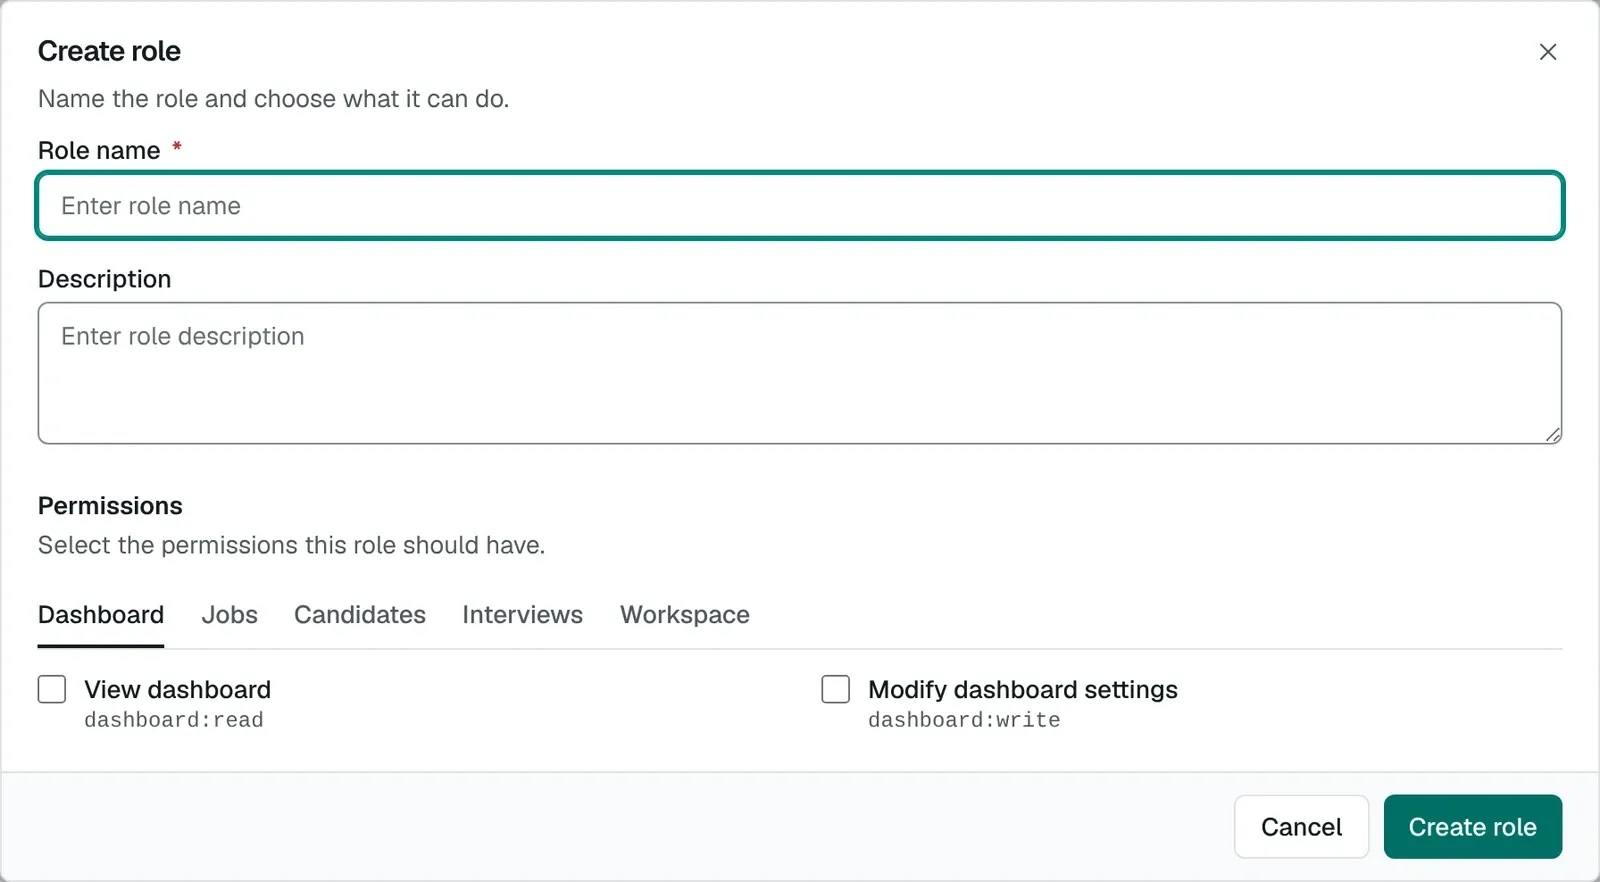
The Create role dialog: name the role, then tick permissions in the tabs below.
To edit a role, use the pencil icon, change it and select Update role. To remove one, use the trash icon and confirm Delete role. A role that is still assigned to members cannot be deleted. Move those members to another role first.
The permission picker has five tabs. Outreach permissions are not listed there. They come with the built-in Talent Acquisition, Hiring Manager and Admin roles.
How do I remove someone’s access?
- Open the member’s User settings page from Team members.
- Select Remove user.
- Confirm in the dialog. They lose access to the workspace and everything in it. This cannot be undone, but you can invite them again.
You cannot remove yourself this way. To leave a workspace, use Leave workspace at the bottom of the Team members tab. The last admin cannot leave. Give another member the Admin role first.
How do workspace settings differ from the admin console?
Workspace settings belong to one workspace. They cover members, roles, storage and reporting and email templates, and your role decides what you can open. Select the workspace name in the sidebar to reach them.
The Admin console is the platform-level area for the TalentsGrid service itself, with pages for tenants, plans, subscriptions and users. It appears in your account menu only if you are a platform administrator, and a workspace Admin role does not grant it. Most customers never need it.
How many members does my plan allow?
| Plan | Members per workspace | Workspaces |
|---|---|---|
| Free | 3 | 1 |
| Pro | 3 | 5 |
| Business | 50 | Unlimited |
The count includes you. When the limit is reached, the invite dialog says “Member limit reached” with the number, and offers Upgrade your plan. See the pricing page for plan details.
FAQ
Who can invite people?
Members whose role includes “Manage company users”. The built-in Admin role has it.
Can a member belong to more than one workspace?
Yes. A person can be invited to several workspaces and switch between them from the workspace switcher in the sidebar. Their role is set separately in each one.
Why does my invitation say the user was not found?
TalentsGrid only invites people who already have an account. Ask them to sign up at app.talentsgrid.com with the email you plan to use, then invite them.
Does the invited person get an email?
No. Tell them yourself. The invitation appears under Pending invitations the next time they open TalentsGrid.
Can I give someone access to one job only?
A role applies to the whole workspace, so it cannot be limited to one job. A job’s page has a Permissions section where you choose its hiring manager and assigned recruiters. If a client should see only their own jobs, create a separate workspace for that client.
What happens to a role when I delete it?
Deleting is blocked while members still have the role. Reassign them, then delete it.
Does the Admin role include the platform admin console?
No. Workspace roles and platform administration are separate. The admin console is for the people who run TalentsGrid.
Where do I go next?
Read getting started with TalentsGrid for the first-day checklist, or the storage setup guide if you manage where CVs live.